When fine-tuning dirt bike brake components, examine for wear indicators on brake pads. Guarantee even wear and no signs of glazing for peak performance. Adjust calipers accurately for proper alignment with rotors. Secure bolts evenly and test for smooth operation. Address excess fluid by burping brakes and resetting pistons. Tackle brake noise and performance issues promptly for safety. Follow maintenance best practices to enhance longevity. Remember, mastering these adjustments is essential for excellent dirt bike brake performance.
Key Takeaways
- Regularly inspect brake components for wear and alignment.
- Adjust calipers evenly and align with rotors for optimal performance.
- Use quality brake pads and fluid to maintain safety and effectiveness.
- Follow manufacturer guidelines for lever adjustment and maintenance.
- Seek professional help for complex adjustments or issues beyond DIY capability.
Signs of Brake System Issues
If you notice a spongy brake lever on your dirt bike, it could indicate air or fluid issues within the brake system. A spongy brake lever can affect your stopping power and compromise your safety on the trails.
To address this, it's important to inspect the brake system thoroughly. Check for any leaks in the brake lines or master cylinder that could introduce air into the system. Bleeding the brakes may be necessary to remove any air bubbles and guarantee peak brake performance. Additionally, examining the brake fluid level and quality is vital for maintaining proper function.
Adjusting your brakes might be needed to restore the firmness of the brake lever and regain efficient braking. By addressing these brake problems promptly, you can enhance your overall riding experience and ensure maximum safety while out on the trails.
Inspecting Brake Pad Wear
Examining the wear on your dirt bike's brake pads is important for maintaining peak braking performance. To inspect your brake pads properly, check for wear indicators such as thickness and grooves. Measure the pad thickness using a caliper to make sure they're within spec.
Look closely at the pad surface for even wear and signs of glazing or contamination. Any uneven wear patterns or damage on the brake pads should be noted. If the thickness is below the minimum requirements, it's essential to replace the brake pads promptly to maintain peak braking performance.
Remember, brake pads play a crucial role in your bike's safety and performance, so keeping them in top condition is important. Regular inspection and timely replacement are key practices to make sure your dirt bike's brake system functions effectively when you need it most.
Stay proactive in monitoring your brake pads to ride confidently and safely.
Lever Adjustment and Maintenance
When adjusting and maintaining the lever on your dirt bike, guarantee ideal reach and comfort by adjusting the brake lever distance from the bars. Start by locating the lever adjustment screw near the brake caliper and adjust it to achieve the desired distance.
Be cautious not to overtighten the screw, as this can lead to issues with the lever's functionality. If you encounter problems after adjustments, consider using a stock lever for comparison to troubleshoot any discrepancies.
Post-installation, check the lever adjustment to ensure it operates correctly. For peak performance, you may also utilize a vibrating machine to enhance the brake system's overall effectiveness following adjustments.
Bleeding or Replacing Brake Pads
To maintain peak brake performance on your dirt bike, bleeding the brake system to remove air bubbles and replacing worn brake pads are essential maintenance steps.
Bleeding the brake system is critical for removing air that can compromise braking efficiency. When bleeding, start by attaching a clear tube to the bleed valve and collecting old fluid in a container. Pump the brake lever while keeping an eye on the fluid level, making sure to tighten the valve before releasing the lever. This process removes air and guarantees ideal brake function.
When it comes to replacing brake pads, inspect them regularly for wear. Sintered pads are a great choice for precise modulation and control. To replace old pads, loosen the caliper bolts, remove the worn pads, and insert the new ones. Ensure the pads align correctly with the brake rotor and tighten the bolts securely.
Regular maintenance of brake pads and bleeding is key to keeping your dirt bike's brake system in top condition for peak performance.
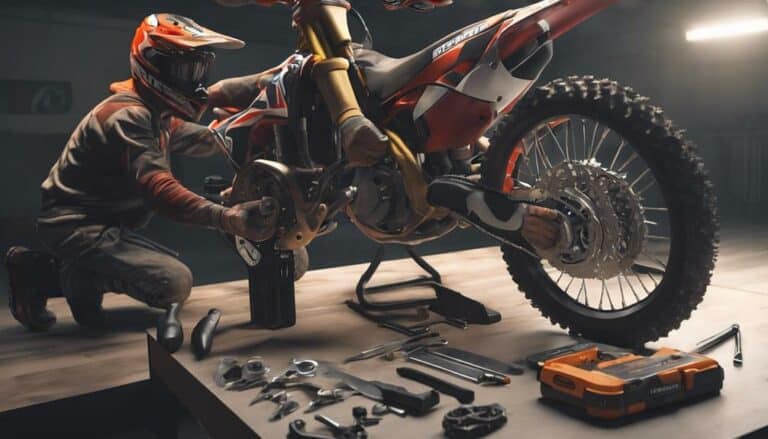
Caliper Realignment Techniques
For excellent brake performance on your dirt bike, caliper realignment techniques play a pivotal role in ensuring proper alignment with the rotor and brake pads. To begin, loosen the caliper bolts to enable adjustment without the need to remove the caliper entirely.
Next, gently rock the caliper from side to side to align it accurately with the rotor for ideal positioning. Utilize a business card or feeler gauge to guarantee even spacing between the rotor and brake pads, which is essential for efficient braking.
Gradually tighten the caliper bolts evenly to prevent misalignment during the adjustment process. After realigning, test the brakes to ensure smooth operation; if needed, make further adjustments to achieve peak performance.
Dealing With Excess Fluid
Addressing excess fluid promptly is essential to prevent brake rubbing issues and guarantee peak performance of your dirt bike's brake system. If you notice excess fluid in your brake system, you must take immediate action to avoid brake drag and noise.
To address this, start by tightening the caliper bolts to secure the pads in place. Next, you'll need to burp the brakes to remove any excess brake fluid. Using DOT fluid for this process is important to maintain the efficiency and responsiveness of your brakes. Proper tools are essential for accurately resetting the pistons and realigning the caliper.
Failure to address excess fluid promptly can lead to brake rubbing issues, affecting the overall braking performance of your dirt bike. By tightening the caliper, burping the brakes, and using the right fluid, you can ensure your brakes function optimally and avoid potential performance issues down the line.
Addressing Brake Noise and Performance
When troubleshooting brake noise and performance issues on your dirt bike, start by identifying the root causes such as contamination or glazing of brake pads. Contaminated pads can lead to howling brakes, affecting both performance and safety. To address this, replace the contaminated pads and clean the rotor with isopropyl alcohol. Additionally, sanding and scuffing glazed pads can help improve brake performance and reduce noise. It's essential to also check for worn or misaligned brake rotors, as these can greatly impact braking efficiency. If the rotor is worn, replacing it is necessary for top-notch performance. Following manufacturer-specific troubleshooting procedures is key to effectively address noisy brake problems.
| Brake Components | Actions Required |
|---|---|
| Contaminated pads | Replace and clean rotor |
| Glazed pads | Sand and scuff |
| Worn rotor | Check and replace |
Adherence to Maintenance Best Practices
To guarantee your dirt bike's brake system operates efficiently, remember to conduct regular brake inspections. Maintain correct fluid levels, and replace pads as needed. Adhering to these maintenance key practices will help prevent brake issues and ensure peak performance during your rides.
Neglecting these essential steps may result in compromised braking capabilities and potential safety hazards.
Regular Brake Inspections
Regular brake inspections are a critical aspect of maintenance best practices, guaranteeing peak performance and safety for your dirt bike. To maintain your bike's braking system effectively, follow these steps:
- Schedule Inspections: Conduct thorough brake inspections every 20-30 hours of riding to detect any issues early.
- Monitor Brake Pads: Regularly check brake pads for wear and tear to guarantee efficient braking and safe operation.
- Check Fluid Levels: Verify brake fluid levels and quality to prevent brake fade and maintain consistent braking power.
Correct Fluid Levels
Maintain top performance and safety for your dirt bike by keeping accurate fluid levels in the brake system to guarantee consistent and reliable braking. Brake fluid levels are crucial for peak performance as they help sustain hydraulic pressure within the system. Incorrect levels can result in reduced braking efficiency and present safety hazards.
Regularly check and top up the brake fluid following manufacturer recommendations to ensure proper function of the brake components. By adhering to the correct fluid types and levels, you guarantee responsive and effective braking on your dirt bike.
Prioritizing brake system maintenance, specifically monitoring brake fluid levels, is key to preventing potential issues and maintaining peak performance while riding.
Proper Pad Replacement
For peak braking performance, ensure the brake pads are aligned properly with the rotor to guarantee effective contact.
When it's time for brake pad replacement, follow these best practices:
- Choose Quality Pads: Opt for sintered brake pads for enhanced braking performance.
- Maintain Alignment: Make sure the brake pads are correctly aligned on the rotor surface to maximize contact.
- Monitor Wear: Regularly inspect the brake pads for wear and replace them before they become too worn to prevent damage to the rotor.
Conclusion
To sum up, mastering the art of adjusting dirt bike brake components is like fine-tuning a musical instrument – it requires precision, attention to detail, and practice.
By following the best practices outlined in this article, you can guarantee your brakes perform at their best and keep you safe on the trails. Remember, a well-maintained brake system is the key to a smooth and enjoyable ride.
Keep practicing and perfecting your brake adjustments for peak performance.