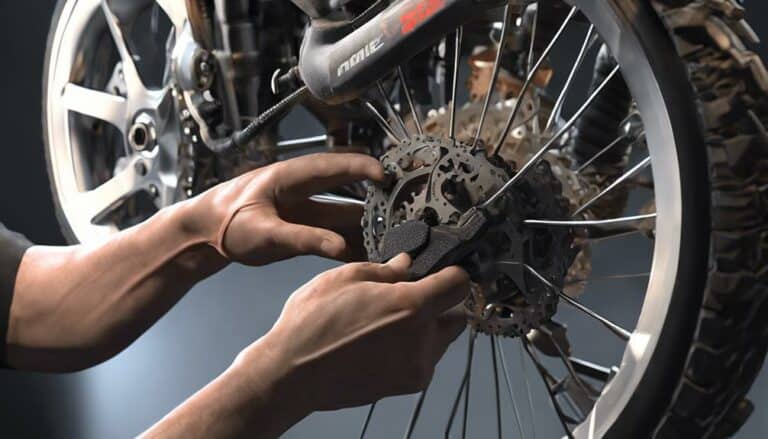
To properly inspect dirt bike brake pads, begin by checking their thickness with a caliper. Look for any uneven wear that could indicate issues. Confirm there's no contamination like oil or debris. Stay on top of brake lever pressure changes. Invest in a good flashlight to enhance visibility, as well as screwdrivers for wheel removal. Differentiate between sintered metal, organic, and semi-metallic pads for diverse biking needs. Understanding the signs of pad wear is crucial for safe riding. Maintain a minimum 3mm pad thickness. Aim for even wear on both pads for balanced braking.
Key Takeaways
- Use a caliper to measure pad thickness.
- Look for uneven wear patterns.
- Check for signs of contamination.
- Inspect both brake pads for even wear.
- Ensure a minimum of 3mm pad material thickness.
Types of Dirt Bike Brake Pads
When inspecting dirt bike brake pads, understanding the types available is crucial for guaranteeing peak performance and safety. Dirt bike brake pads come in three main varieties: sintered metal, organic, and semi-metallic.
Sintered metal brake pads are known for their exceptional durability and heat resistance, making them perfect for off-road riding where conditions can be harsh.
Organic brake pads offer smooth and quiet braking performance, ideal for recreational dirt biking where noise reduction is desired.
Semi-metallic brake pads strike a balance between durability and performance, making them suitable for all-around use on dirt bikes.
Signs of Brake Pad Wear
Examining dirt bike brake pads for indications of wear is a pivotal maintenance task to guarantee your bike's peak performance and safety. When it comes to brake pad wear, there are several signs you should be aware of to ensure your braking system functions effectively. Reduced braking efficiency is a clear indicator of brake pad wear, resulting in longer stopping distances, which can compromise your safety while riding. Additionally, if you hear unusual noises like squeaking or grinding when applying the brakes, it could signify potential brake pad issues that need to be addressed promptly. A visual inspection is vital in identifying thin or worn brake pads, as this is a key indicator of brake pad wear. Regular inspection for thin brake pads is essential for maintaining the best braking performance and ensuring your dirt bike is safe to ride.
| Signs of Brake Pad Wear | |||
|---|---|---|---|
| Reduced Braking Efficiency | Unusual Noises (squeaking, grinding) | Visual Inspection Revealing Thin or Worn Pads | Longer Braking Distances |
Tools for Brake Pad Inspection
To effectively examine dirt bike brake pads, make sure you have the necessary tools at hand, including a flashlight for improved visibility, screwdrivers for potential wheel removal, a caliper for precise measurements, gloves for protection, and cleaning supplies for a thorough examination. When examining brake pads, having the right tools can make the process more efficient and accurate. Here are some essential tools for brake pad inspection:
- Flashlight: Illuminate the brake components for a better view of any wear or damage.
- Screwdrivers: Use these for removing the wheels to access the brake pads easily.
- Caliper: Measure the thickness of the brake pads accurately to determine if they're within the manufacturer's specifications.
Having these tools ready will enable you to inspect your dirt bike brake pads effectively, ensuring your safety and top-notch braking performance.
Step-by-Step Brake Pad Inspection
Begin by thoroughly inspecting the dirt bike brake pads using a flashlight to illuminate and evaluate them for wear and damage. Here is a step-by-step guide to conducting a proper brake pad inspection:
| Step | Procedure |
|---|---|
| 1. Check Thickness | Inspect brake pads using a caliper to measure material thickness for wear. |
| 2. Look for Uneven Wear | Examine for any signs of uneven wear that might indicate issues with the brakes. |
| 3. Check for Contamination | Ensure the brake pads are not contaminated with oil or debris. |
| 4. Verify Adequate Thickness | Confirm that the brake pads have enough material thickness for safe operation. |
Maintenance Tips for Brake Pads
When maintaining your dirt bike brake pads, it's crucial to regularly inspect them for wear and contamination to guarantee peak performance and safety. To make certain your brake pads are in top condition, follow these maintenance tips:
- Check Brake Lever Pressure: Regularly assess the pressure required to engage your brakes. If you notice a significant change, it could indicate an issue with your brake pads.
- Inspect Pad Thickness: Measure the thickness of your brake pads using a caliper. Aim for a minimum of 3mm of pad material to maintain effective braking performance.
- Look for Pad Wear: Confirm both brake pads wear evenly to maintain balanced braking. If you notice uneven wear, it may be time to replace your brake pads.
Conclusion
Now that you have learned the key steps to properly examining dirt bike brake pads, remember to always stay on top of maintenance to guarantee peak performance.
Just like a well-oiled machine, your dirt bike's brake pads need regular attention to keep you riding smoothly.
So next time you hit the trails, remember that a little TLC for your brake pads goes a long way in ensuring a safe and enjoyable ride.

